Zigbee Pairing Principles
In a Zigbee network, devices communicate with each other, relay information, and send the device status back to the network (on/off, etc.). This is called a MESH network, and it is the best feature of Zigbee because it allows for the construction of a virtually limitless wireless network. Any device connected to the mains power (230V) acts as a repeater, forwarding information. Battery-operated devices do not relay information.A Mesh network can be created in its simplest form between a switch and a driver or a Zigbee HUB (Philips HUE, Azoula, Ikea Trådfri, Home Assistant, etc.), which coordinates the devices in the network and manages access. This guide explains how to pair controls with both the hub and the switches, enabling flexible use of lights both via mobile applications and physical light switches.
To use LedStore switches with apps from different manufacturers, the switches and devices must be on the same network. The switch can join the network by adding it as a new Zigbee device. Note that in Philips HUE, switches are added as lights, not as accessories. Typically, the app won’t display the switch on the app screen, because the hub manufacturer hasn’t programmed it for the switch. However, by following our instructions, the switch can be successfully connected to the Zigbee network and used with the app.
It is important that all devices are on the same network before performing the pairing (Touch Link). Below is a summary of the steps to pair Zigbee switches. The most common mistake in pairing is forgetting to connect the switch to the hub, meaning it’s not part of the Zigbee network when attempting the pairing. If pairing is done before the hub connection, the light/device control via the app will not work.
Pairing Process
1. Connect the drivers / receivers to the Zigbee network, i.e., to the hub (name devices as you connect them, e.g., OH spots, OH strips, OH pendant lights).2. Connect the switches to the Zigbee network, i.e., to the hub (do not add them to any rooms separately, it’s enough to complete the pairing process).
3. Perform Touch Link pairing between the light drivers / receivers and the switches.
After these steps, the lights can be used (and programmed) both via mobile apps and physical switches. You can also pair multiple switches to control the same lights, such as in staircases or hallways at both ends. You can also pair multiple lights with one switch.
Pairing Hub and Various Switches
• Obtain and set up the hub / bridge from the desired brand and install the app on your devices.• Install the lights in the Zigbee drivers or receivers, ensuring they are powered on.
• Pair the Zigbee devices, i.e., drivers / receivers, individually to the Zigbee network (Zigbee network pairing through coordinator or hub). Most Zigbee devices are connected to the hub by searching or adding a new light in the app and turning on the power to the device. Pairing will start automatically. Successfully paired lights will flash twice slowly.
• Pair the Zigbee devices (drivers / receivers) and switches with Touch Link. For most Zigbee devices, the pairing mode is activated by pressing the device's programming button four times, following the switch's Touch Link method (images below).
Which switch would you like to pair with?
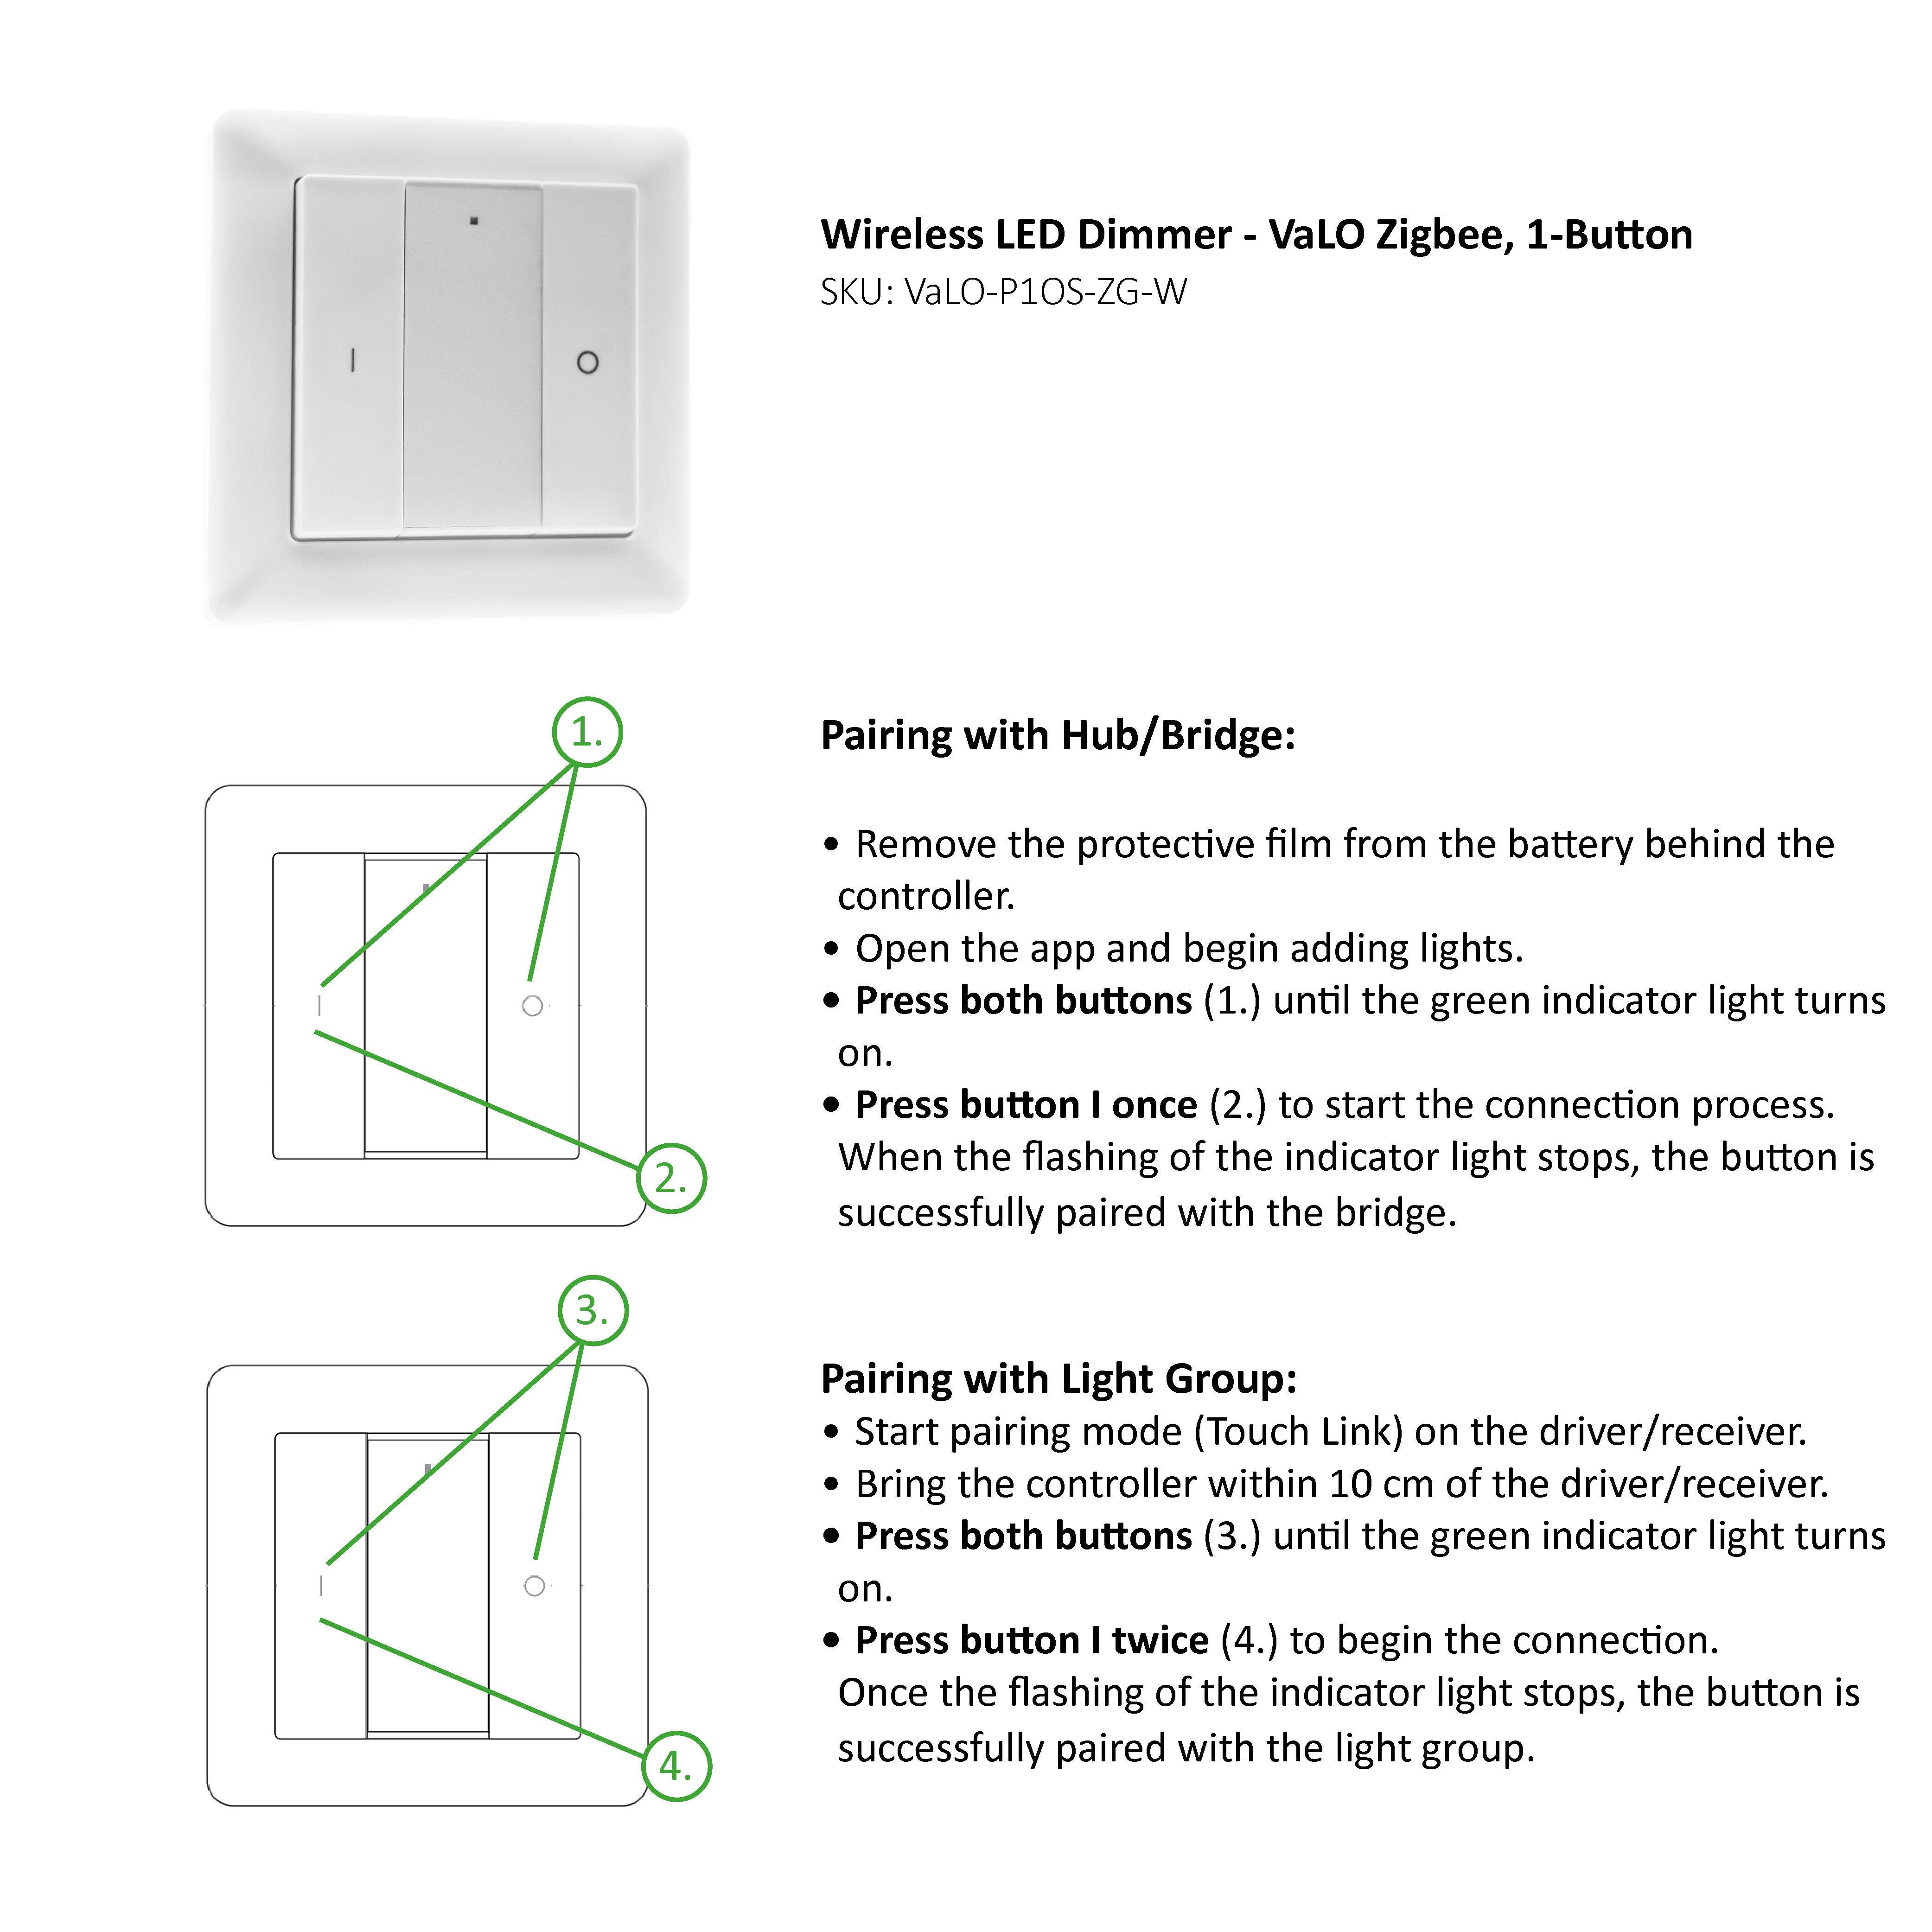
Visual instructions are provided below:- For a one-button switch
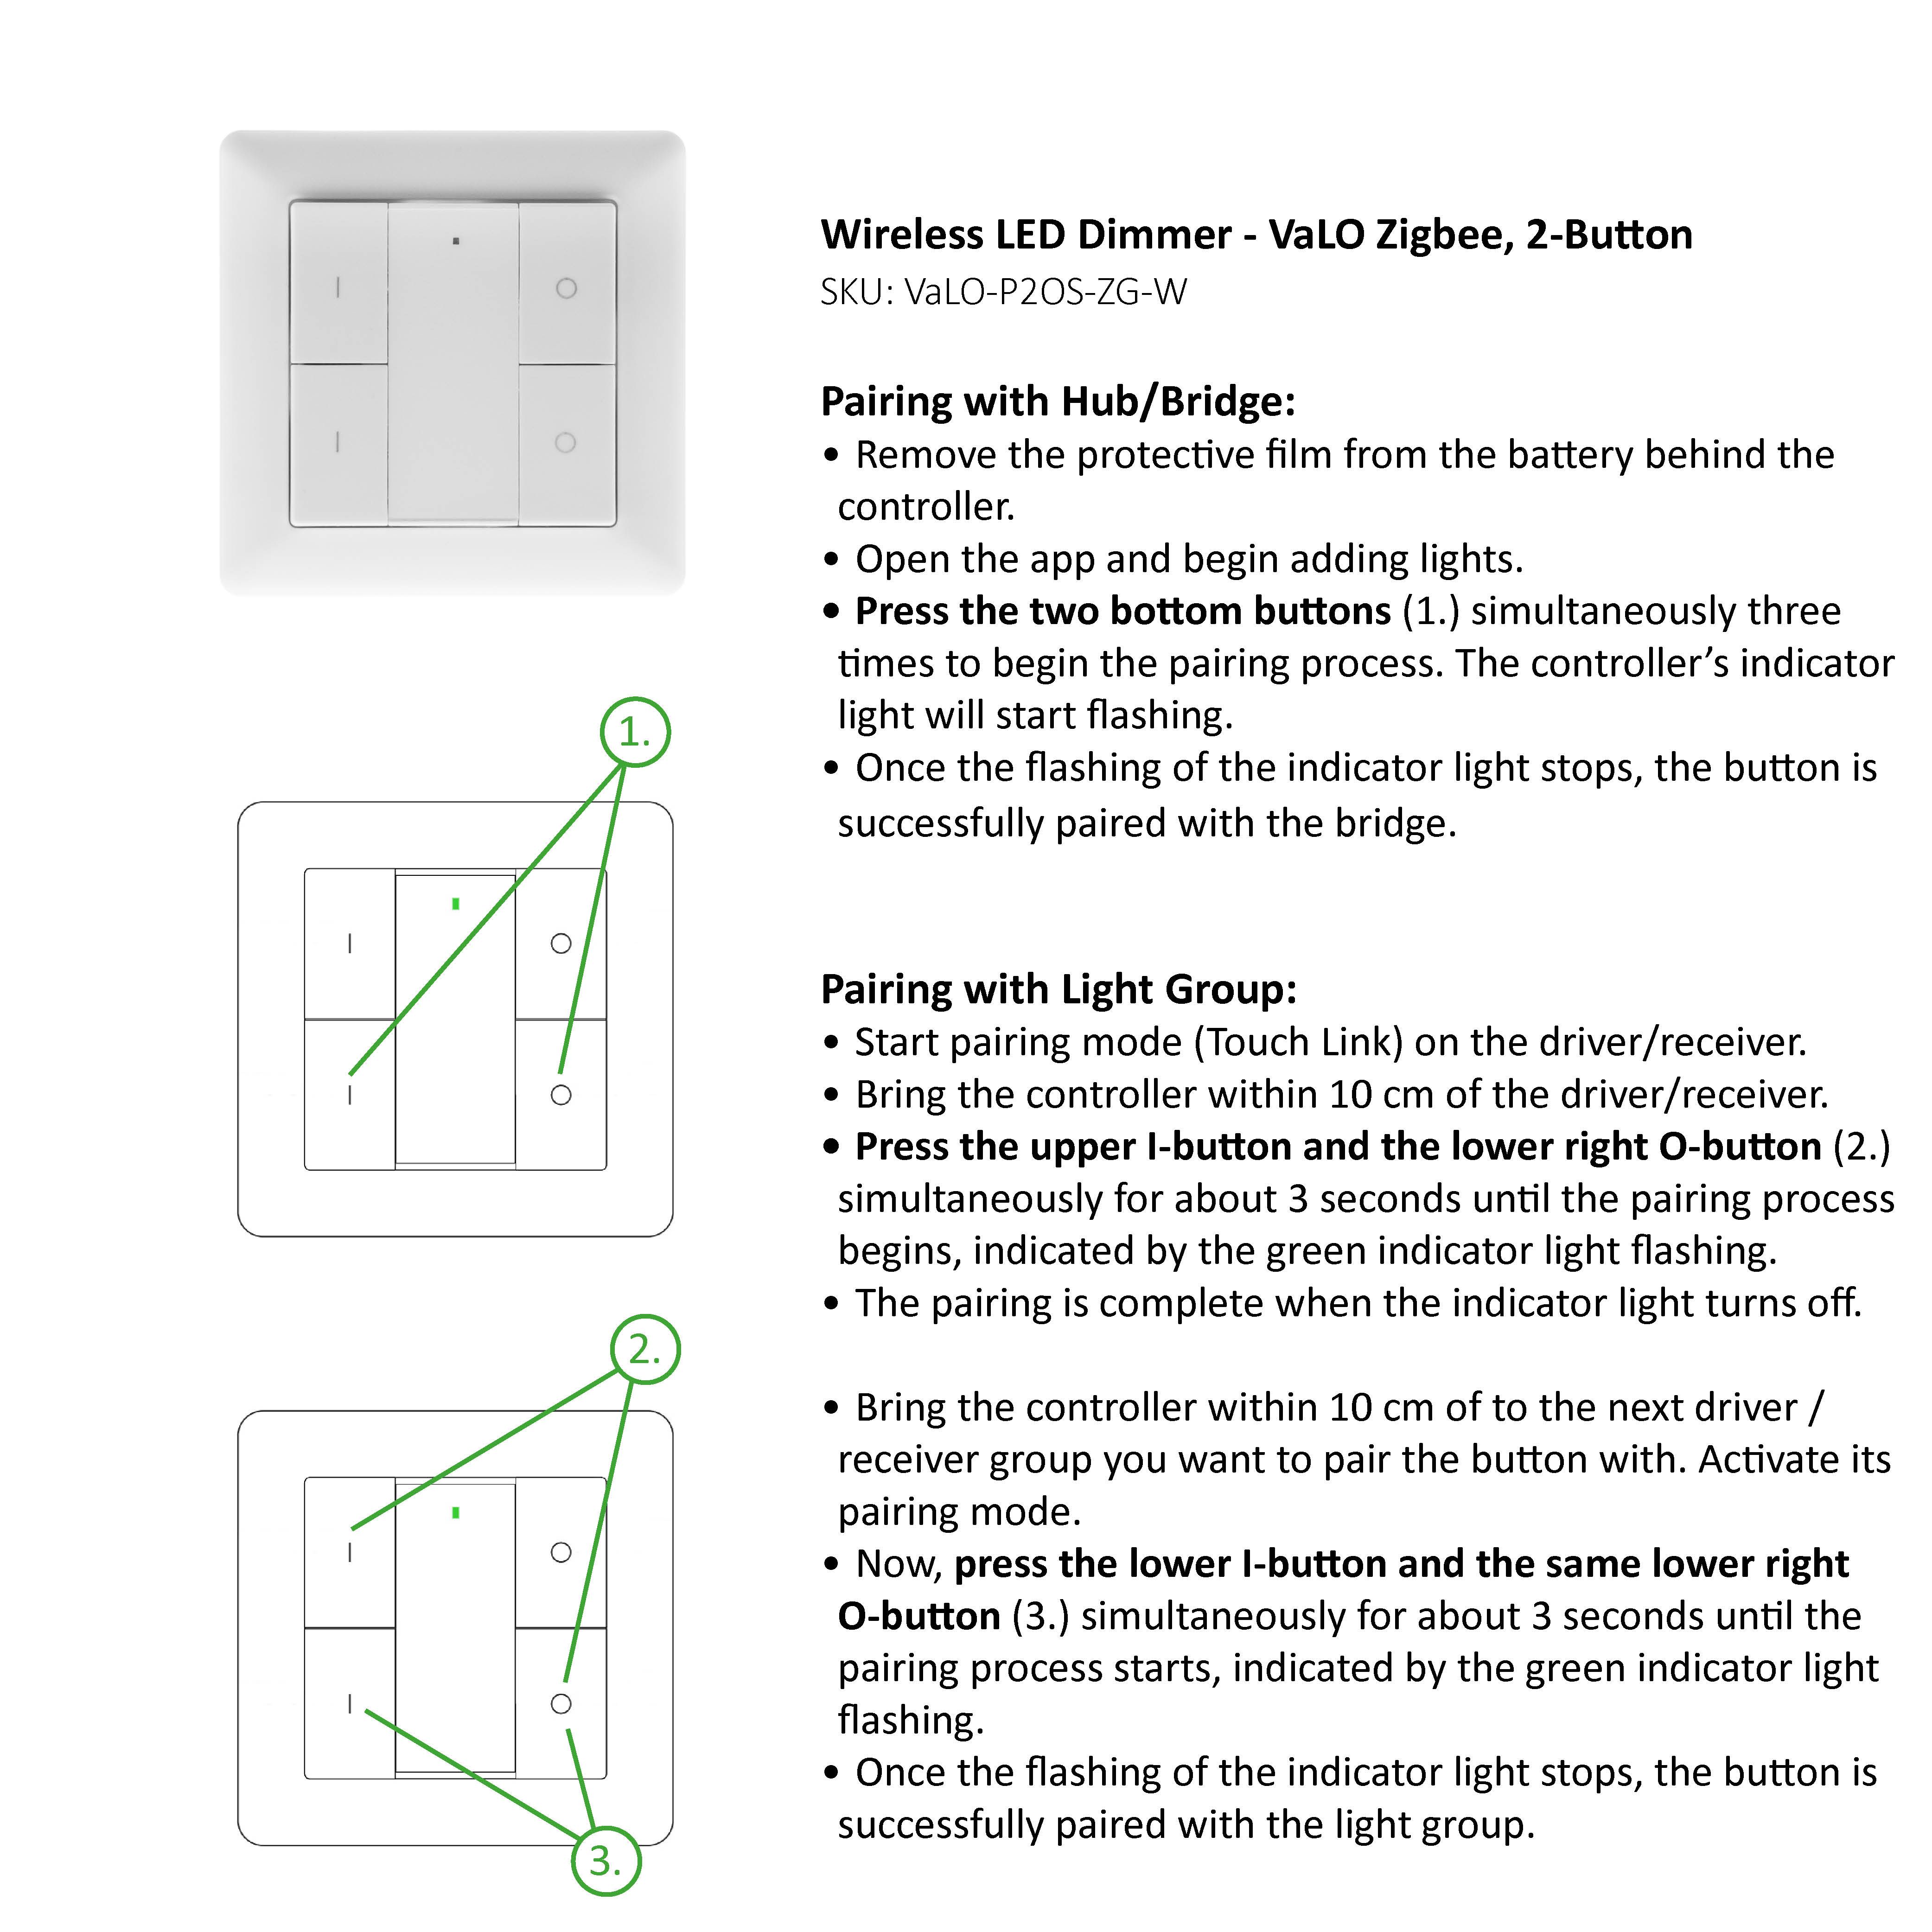
- For a two-button switch
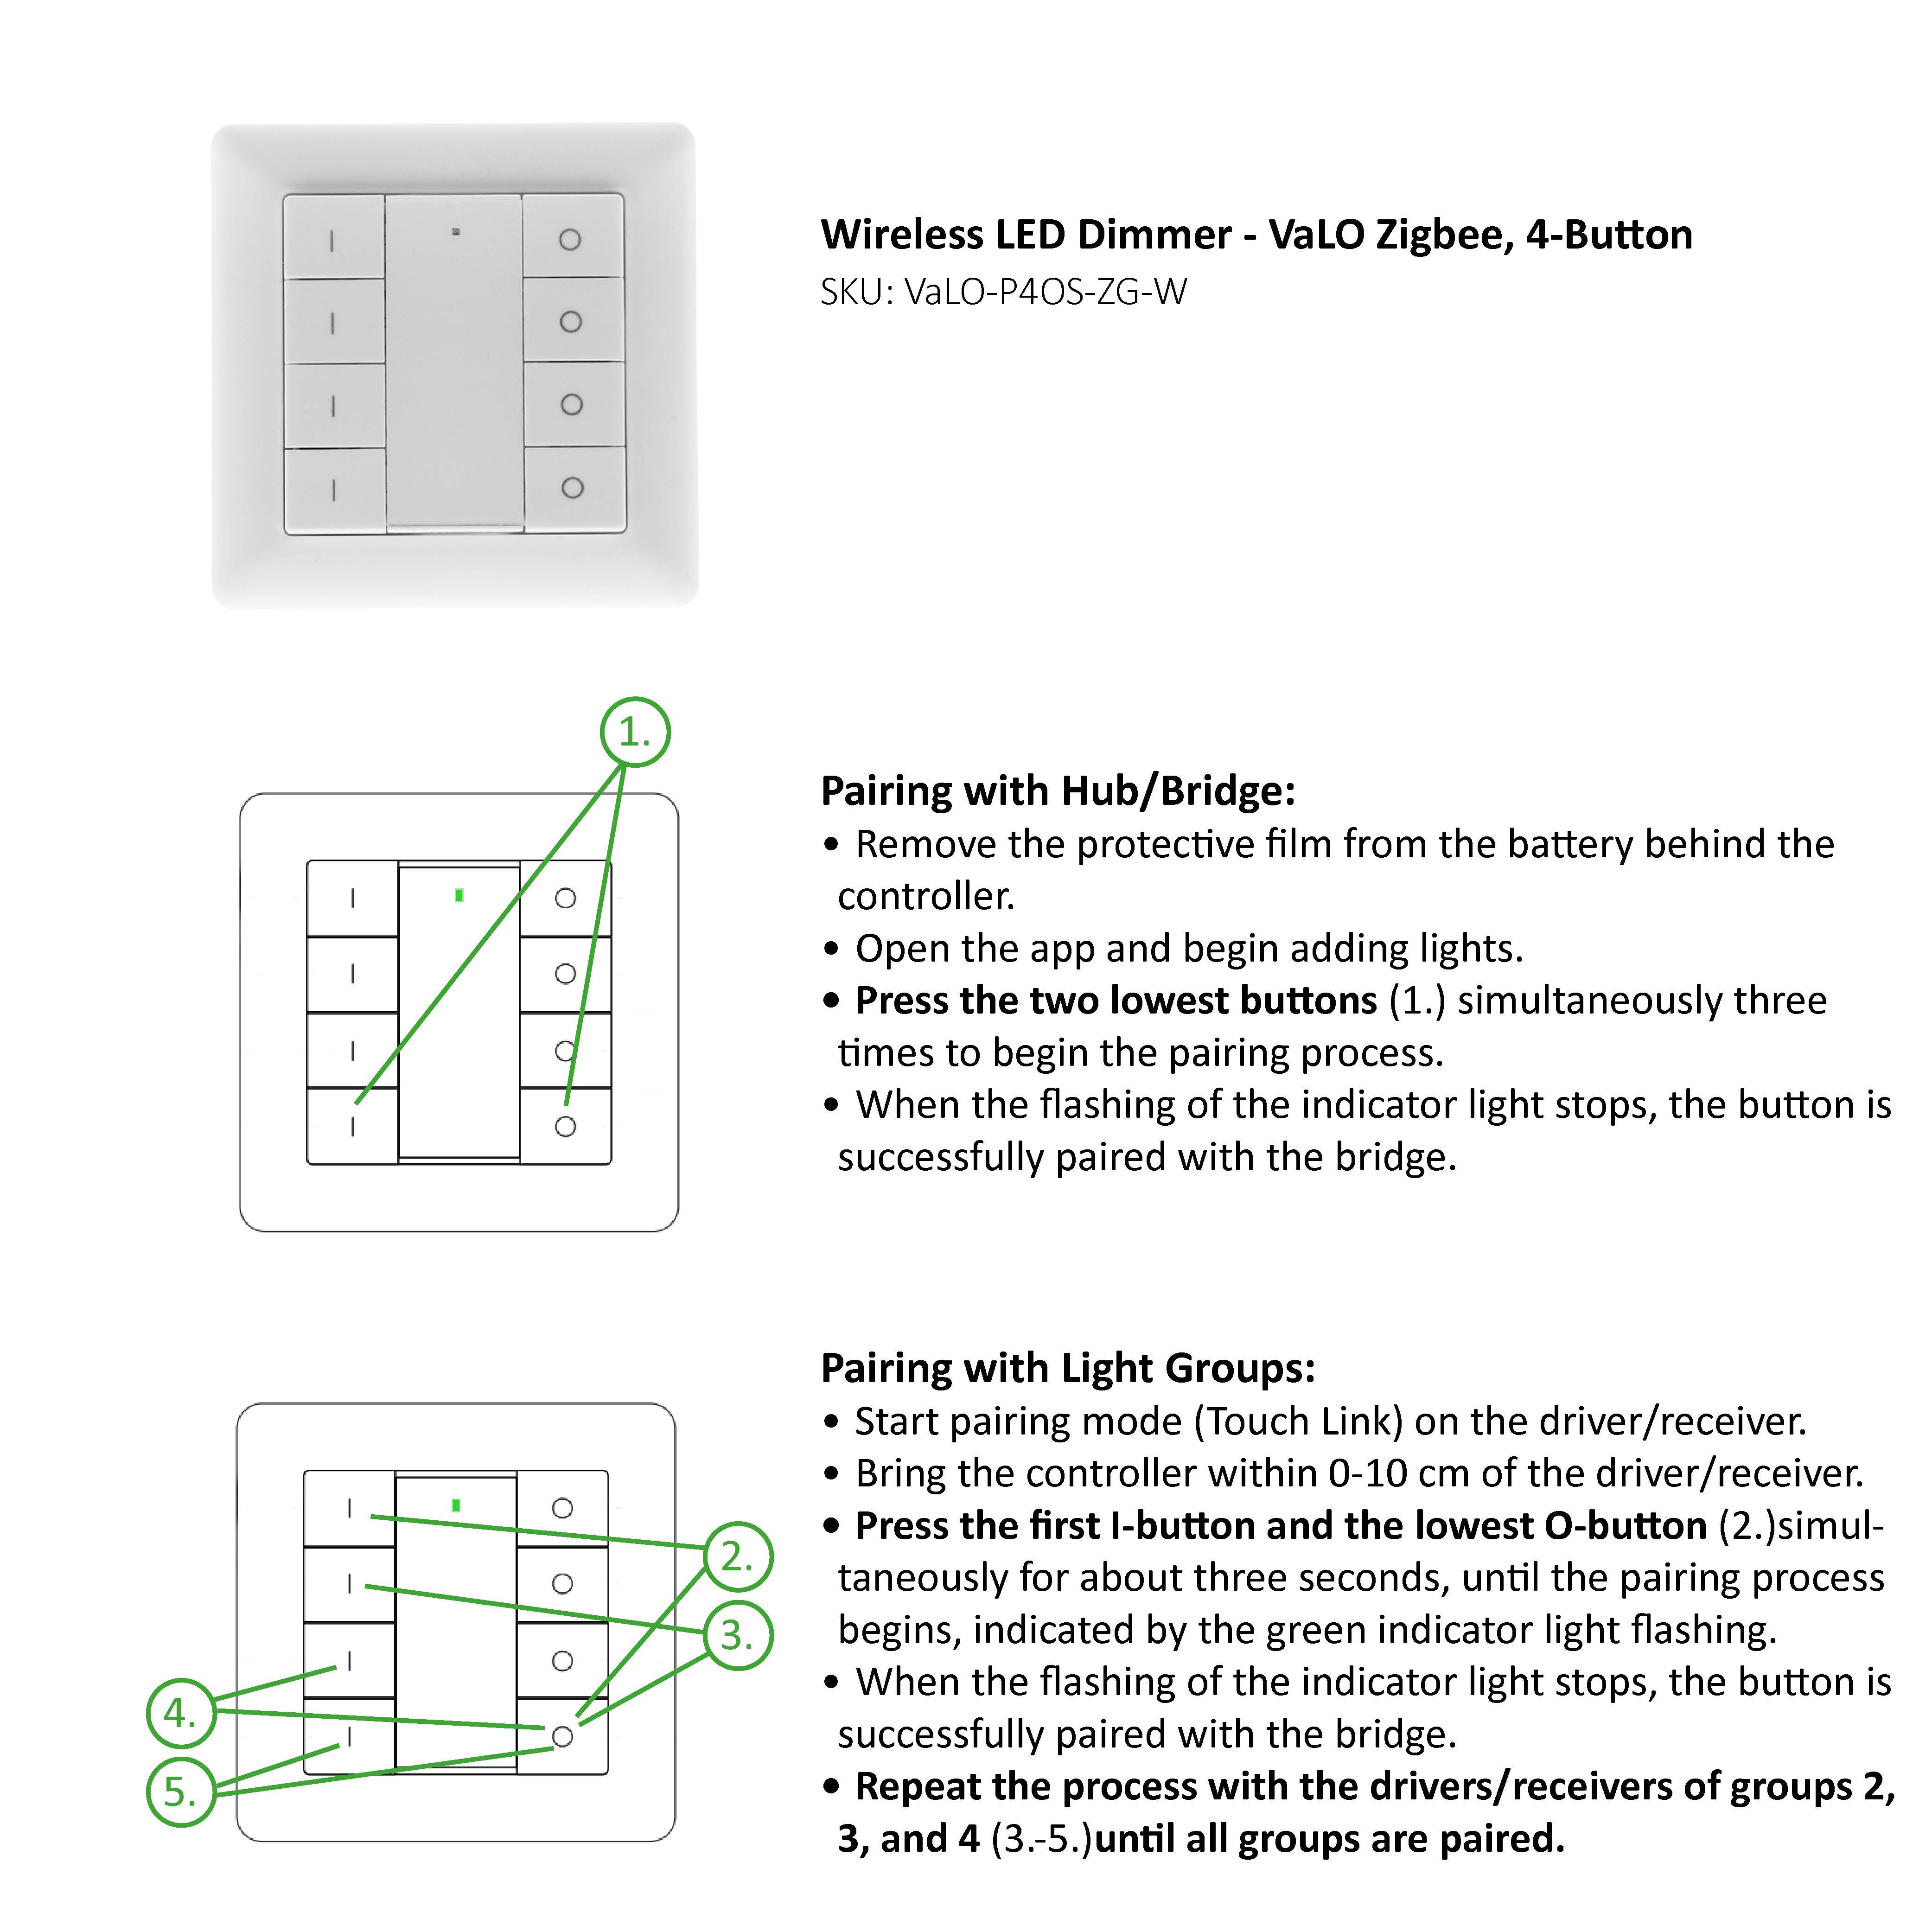
- For a four-button switch
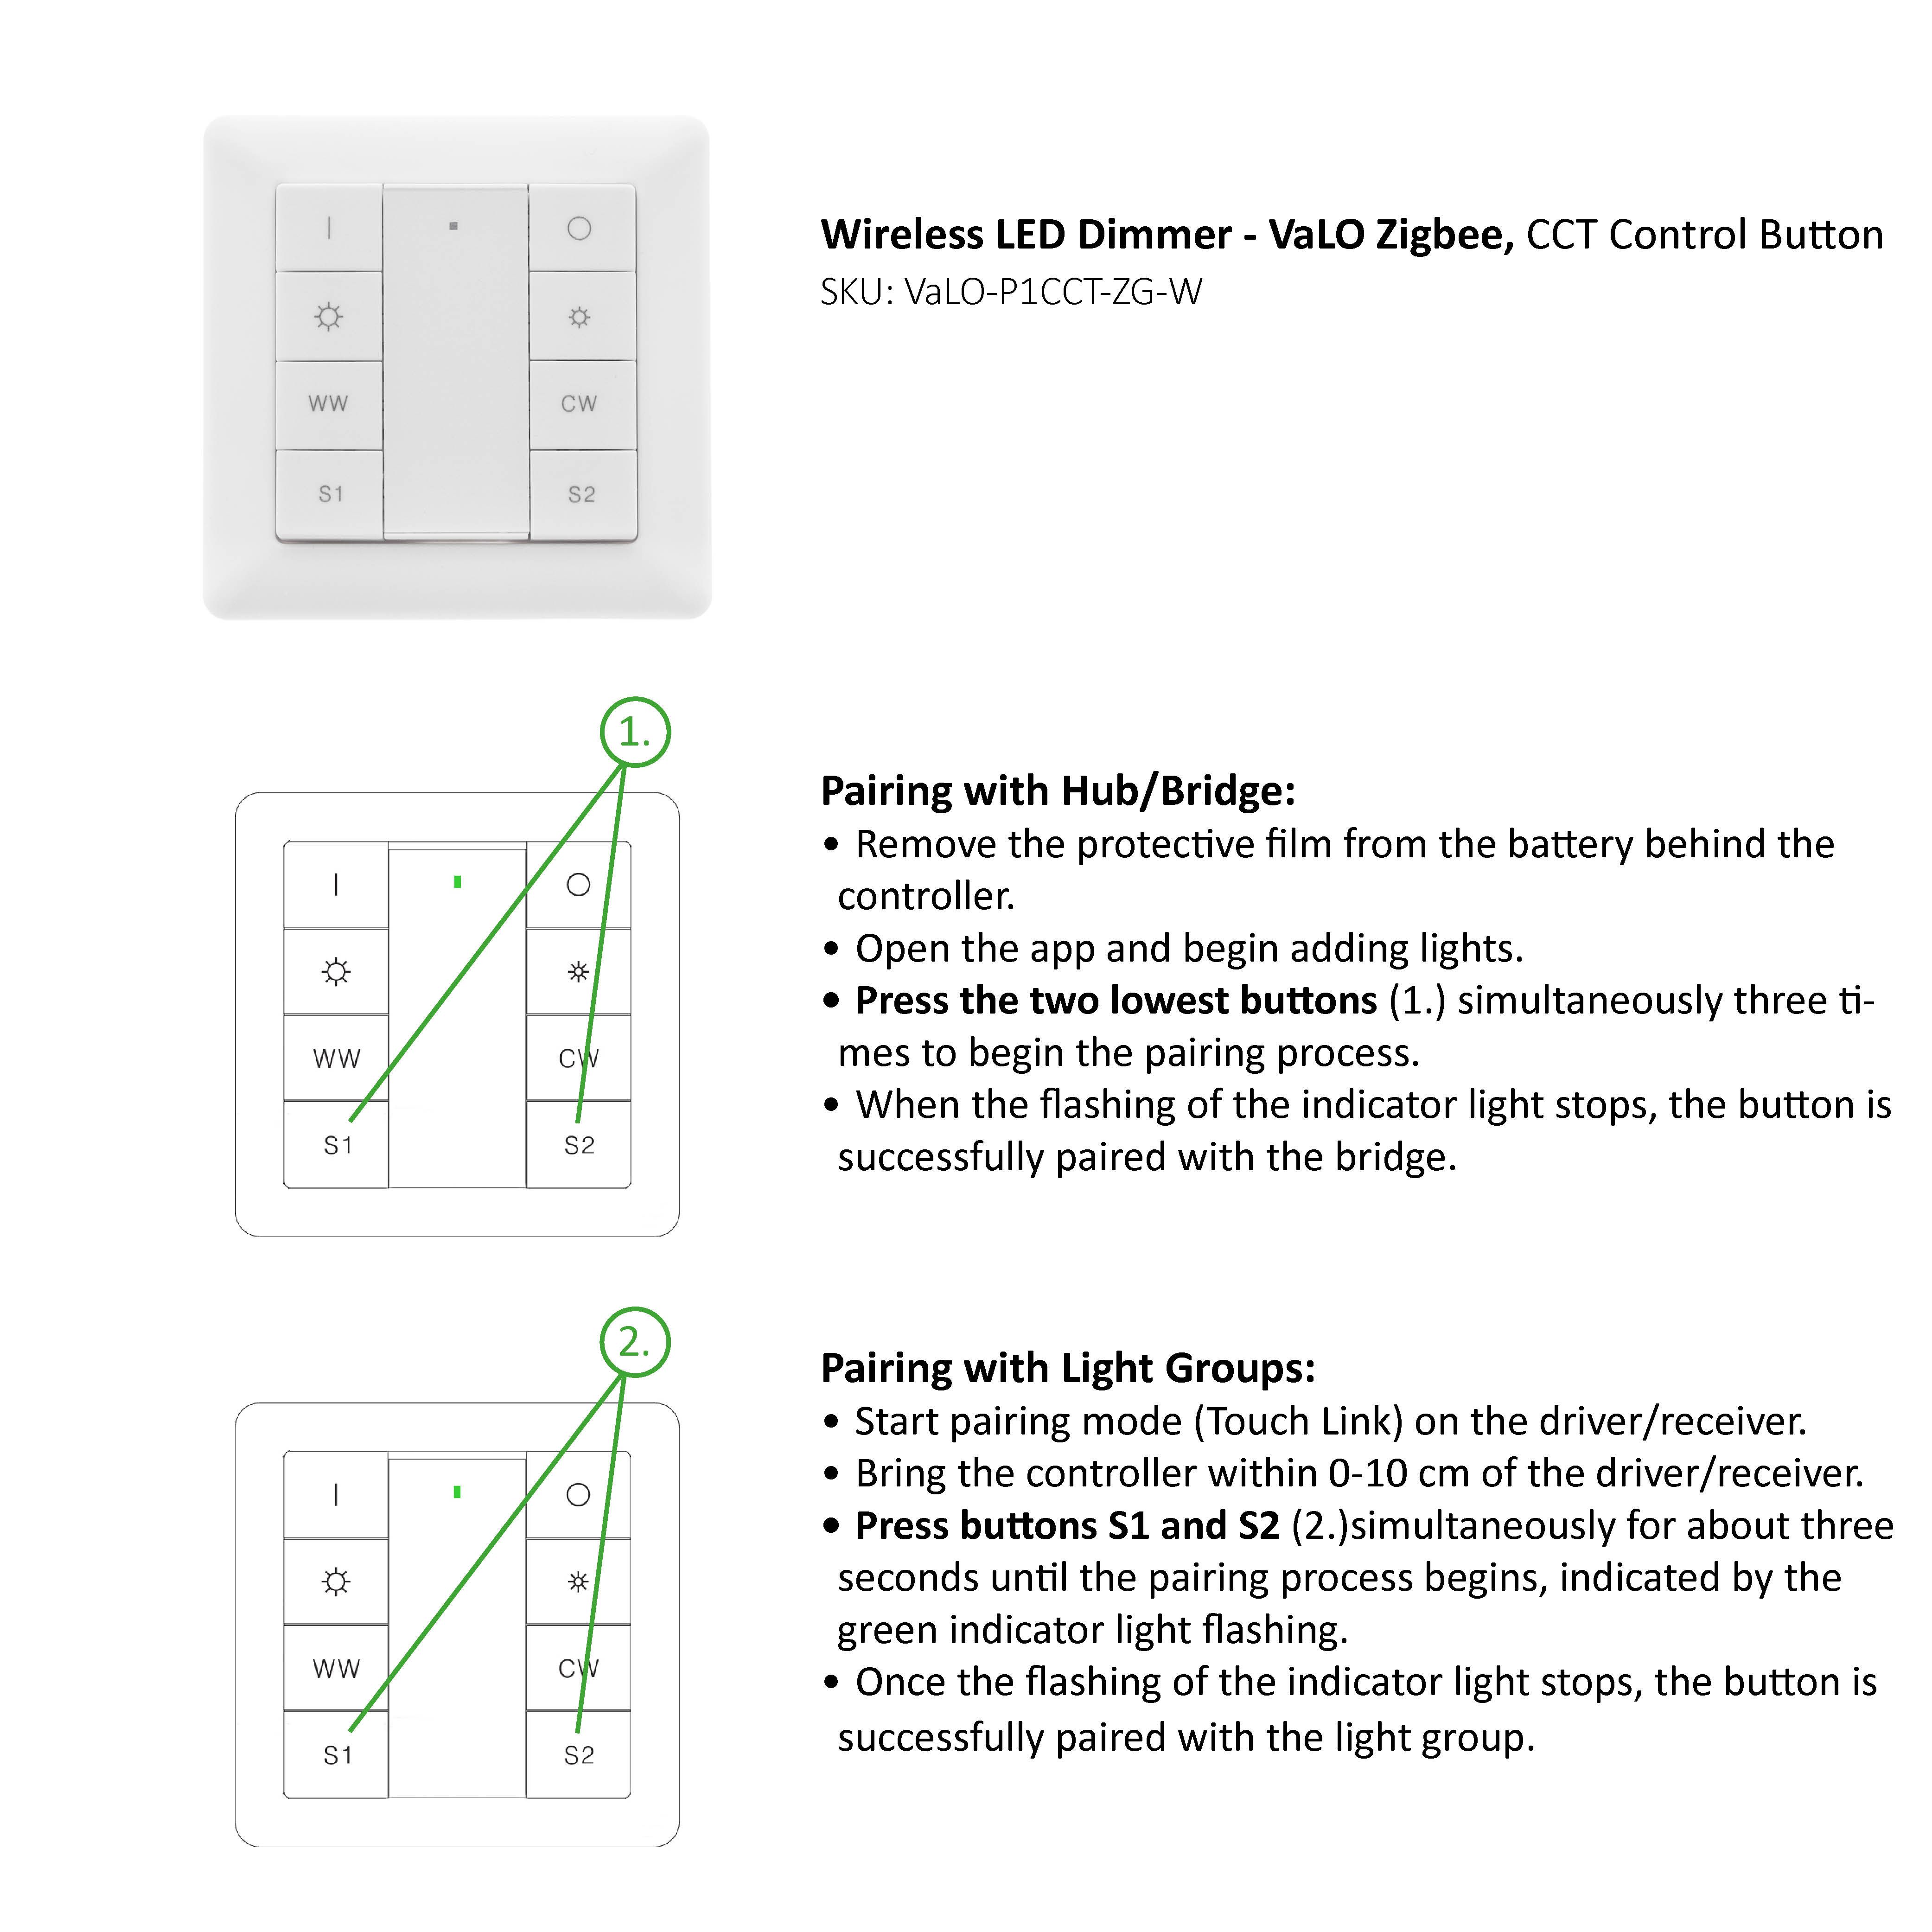
- For a colour temperature adjustable (CCT) switch
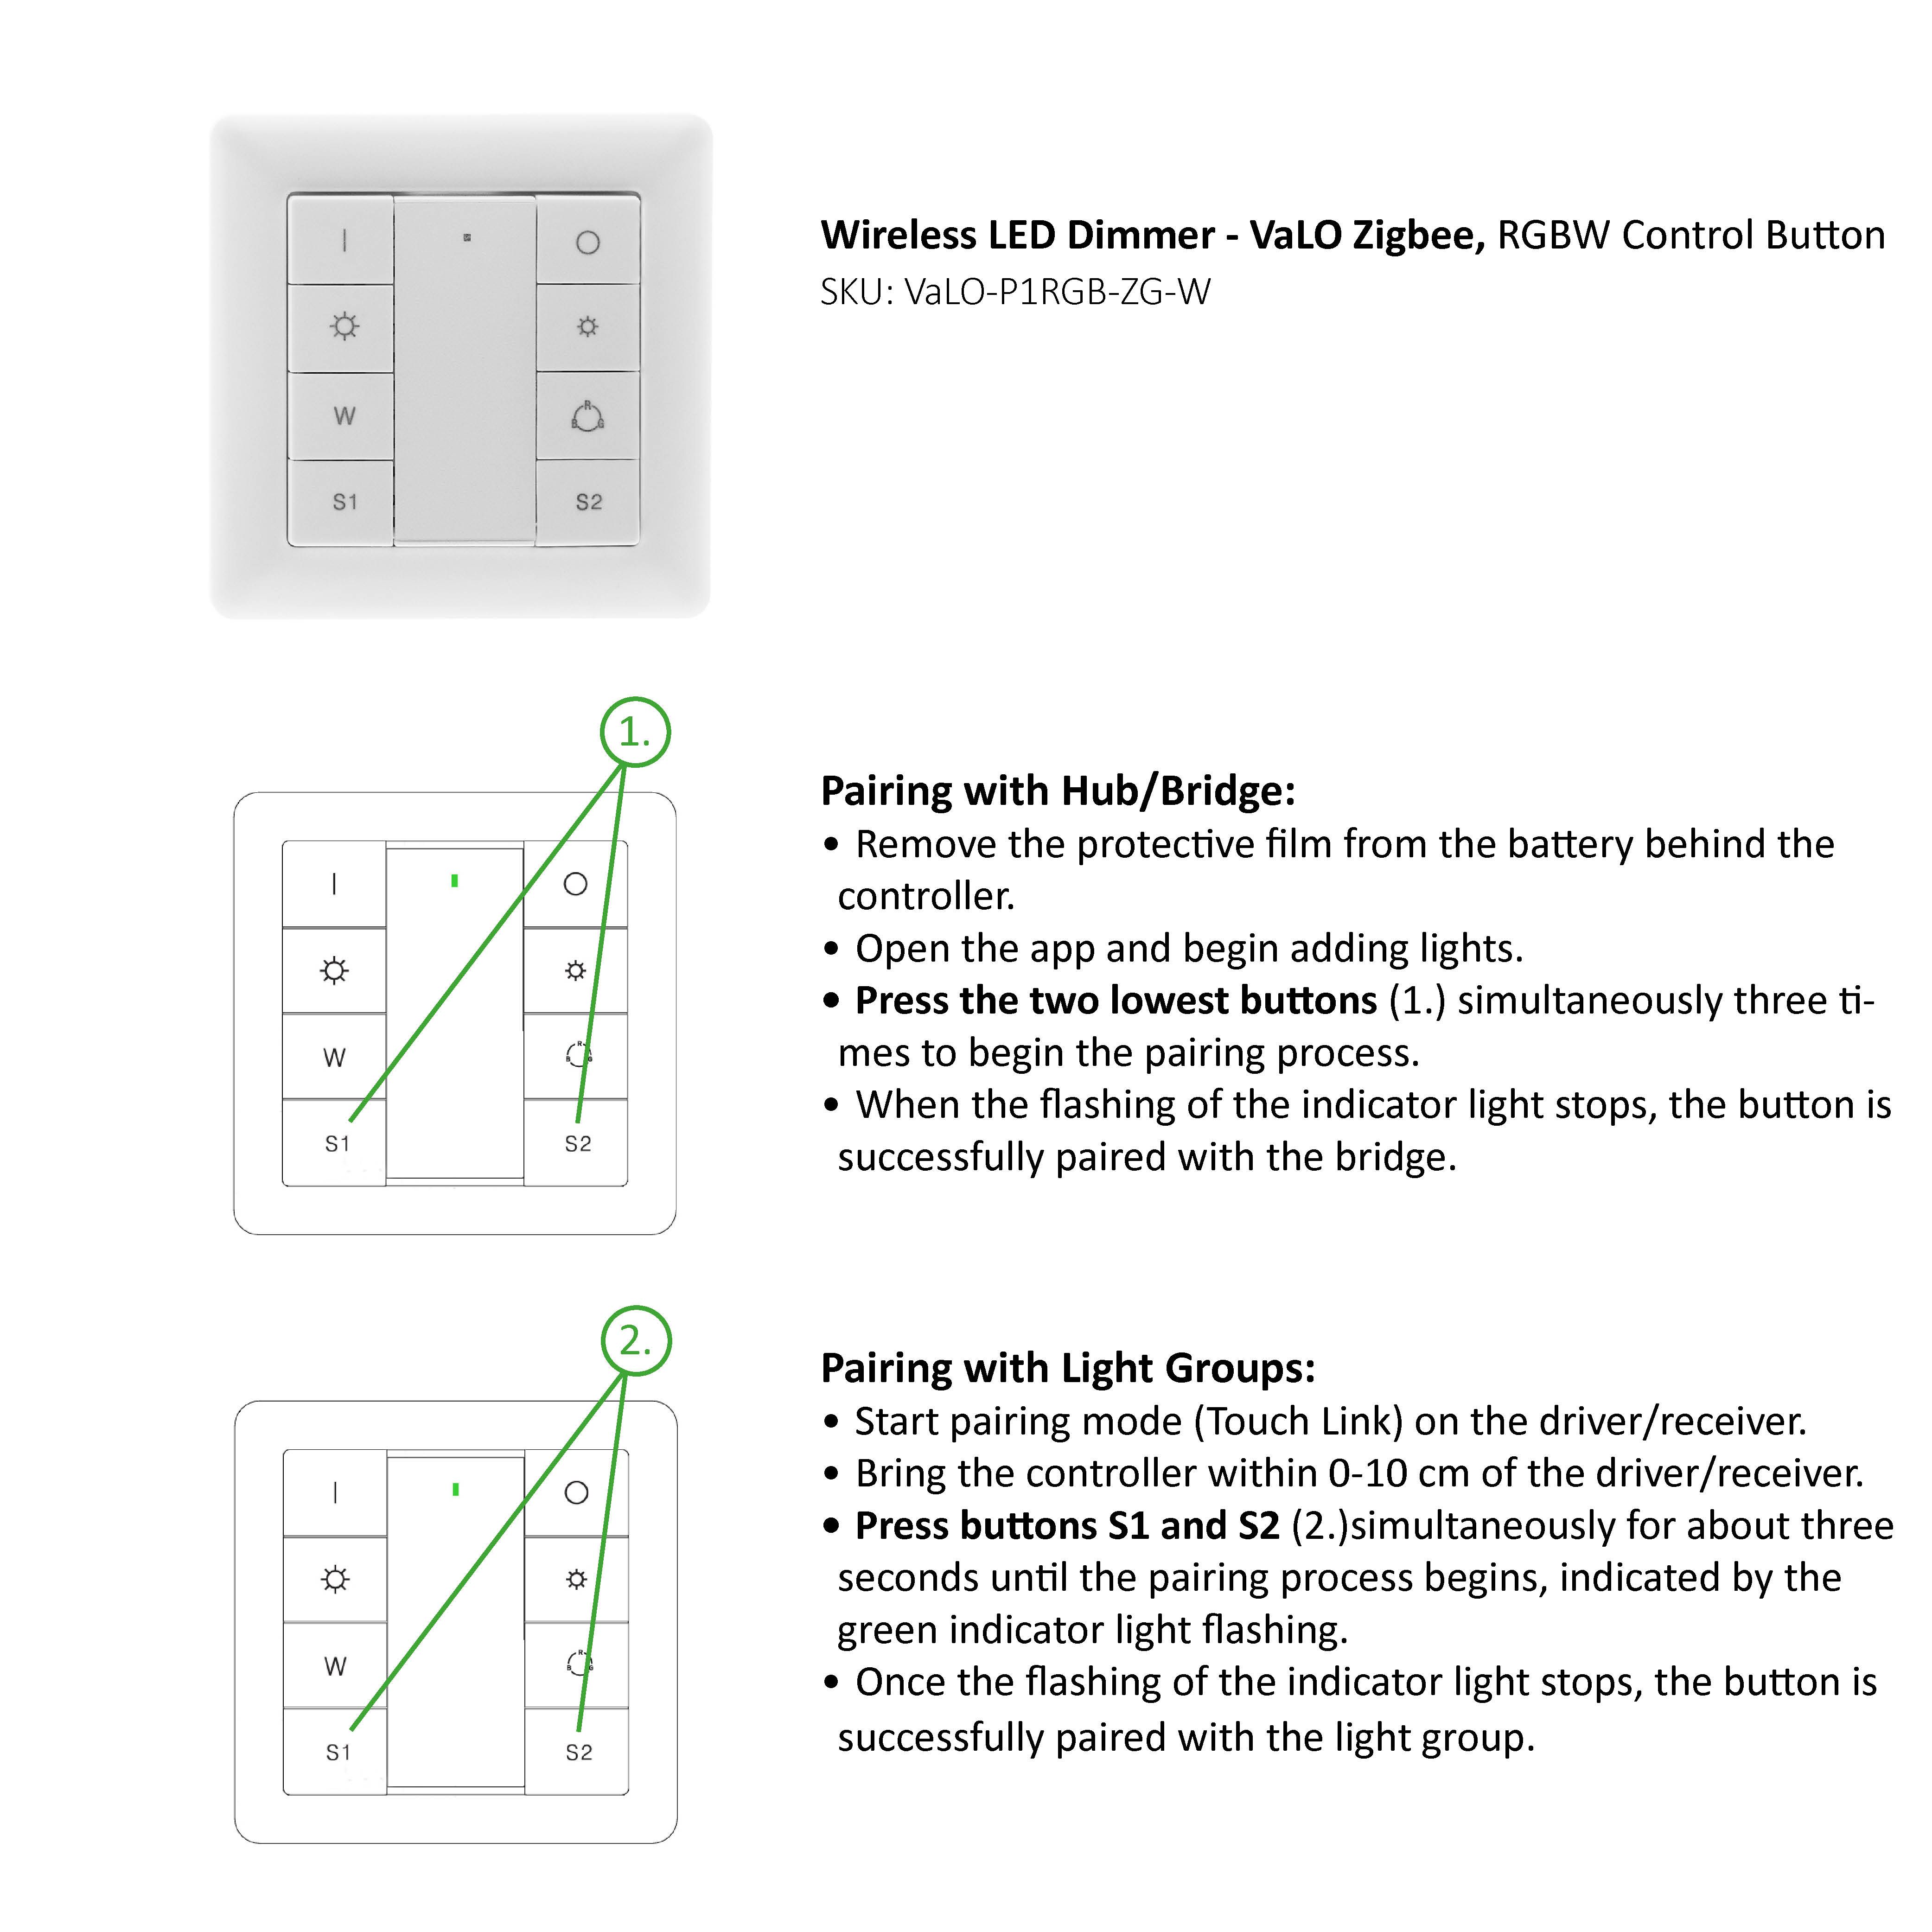
- For a colour adjustable (RGB) switch
Also, check out the pairing tutorial videos on LedStore’s YouTube channel: https://www.youtube.com/LedstoreFi